Batch Printing: ZTB
The whole reason for saving your "Print Scale" with each drawing is so our batch-printing program can automatically send each of your drawings to your printer without your having to set the Print Scale for each in the Print Dialog. Once you have saved your drawings after setting the print scale, they can be printed in any sized group as long as they reside in the same folder on your system. If you try to print a drawing that does not have a scale saved in it's header, the program will prompt you with your options...either canceling, printing "fit to page" or set the print scale according to the current text height, then print, which adds the "Print Scale" to the header of that drawing before it prints so we know what scale to use the next time you print.
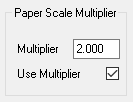
New in Version 9.0 - Paper Scale Multiplier...
...The Paper Scale Multiplier allows you to print to smaller paper at different scales. THIS DOES NOT MEAN YOUR DRAWINGS WILL MEASURE TO SCALE but means they can be printed to where they will accuratly measure at a multiplier of the scale. For example, if you create your drawings to fit on 24h X 36w paper but are printing to 12h X 18w paper you can set the Multiplier to 2.0 as shown above and your drawing will be printed 2.0 times smaller than normal to the fit on the paper. The drawing can then be scaled albiet where you must account for the 1/2 size difference. Note: A Popup will appear when you open this dialog and the "Use Multiplier" box is checked. 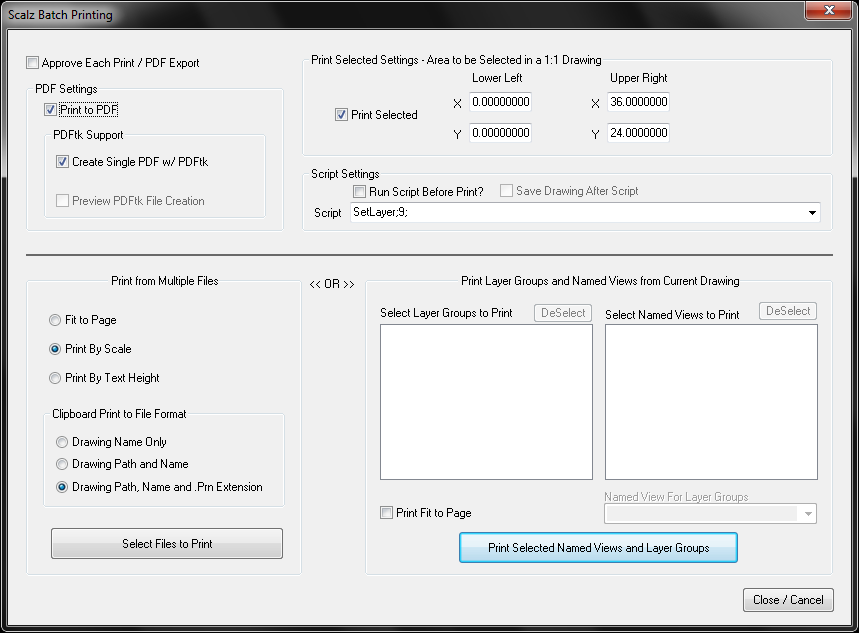
With the Batch Print Dialog you can print to any Printer using your Printer Presets, or Print to file or Export a PDF. The Dialog is broken up into 3 Basic Sections.
Upper Section - The upper half of the dialog allows you to setup the method by which your files will be processed. You can elect to Approve each print in the V CADD Print or Export Dialogs, or the Print Dialog will only appear for the first drawing being processed. You can elect to print to PDF then create 1 PDF file from the PDF's created so all of your PDF files can end up in a singe file. This requires PDFtk which can be installed during the Scalz Installation. You can run a script before printing or Exporting a Drawing. There is also a Print Selected Option that requires that you input the area of a 1:1 drawing that will be select for you. The dimensions of the area of your drawing that is selected are multiplied by the "Scale" of your drawing for the bounding rectangle of the selection.
The Lower Left Section - You use this section if you are a user who creates 1 drawing in each file and needs to print the contents of many files. You cab print Fit to Page, By Scale or by Text Height. ...
1) Print using the scale found in the header.
2) Print fit to page, which requires no print scale be present in the header.
3) Print using current text height which requires no print scale be present in the header and will compute the scale based on the current text height divided by the "full size" text height specified in the Scalz.ini file. Again, if you become familiar with some of the tools "Scalz" was originally based on, you will understand this concept better.
When you click the "Select Files to Print" button the Select Files dialog will appear for you to select the files you want to print.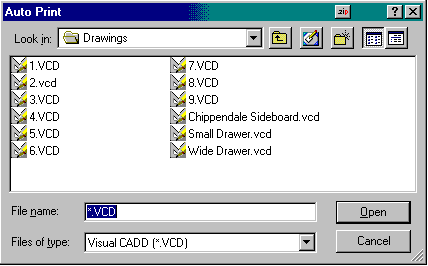
No matter which of the 3 "print "options you select, when you start the print process, your first drawing will be opened in V CADD and the "print dialog" will be displayed. If you choose to"Approve" each drawing, the Print dialog or Export PDF dialog will appear for each drawing. This gives you the opportunity to make sure the correct "Preset" is "Current" in the dialog. After that, the current drawing will be sent to the printer then closed, and each of the drawings you selected will be opened and sent to your printer, then closed, one by one. All of the drawings will be sent to the printer specified in the current "Preset" using the method you have selected. The only setting Scalz changes in the "Preset" is the "Scale", either by the text height, the scale found in the header, or by the "fit to page" option you selected.
You can add as many scripts as you like to the drop down list box by adding them to your Scalz.ini under the [Auto Print Settings] section as shown here...
[Auto Print Settings]
SizeBy=0
NoHeaderSizeBy=0
UpdateHeader=1
UpdatePrintDialog=1
Script=ZTP;
1=PlaceText;
2=SelAll;ChangeColor;12;ChangeApply;
3=ZmOut;
The scripts that are added to the drop down list box are those after 1=, 2= and 3=. You can add as many as you like as long as they are in numerical order.
The Lower Right Section - If you are a user who creates may drawing in the same file, this is the option for you. Using this area, you can setup to print all of the "Scalz Named Views" in the Drawing along with all of the Layer Groups in your file. if you want to print all of your Layer Groups and Scalz Named Views, you need to tell the Program which Named View contains the Layer Groups you want to print. Once you have selected all of the Layer Groups and Named Views you want to print, click the Print Selected Named Views and Layer Groups Button and those files will be printed or Exported to PDF as described above.
Created using Helpmatic Pro HTML